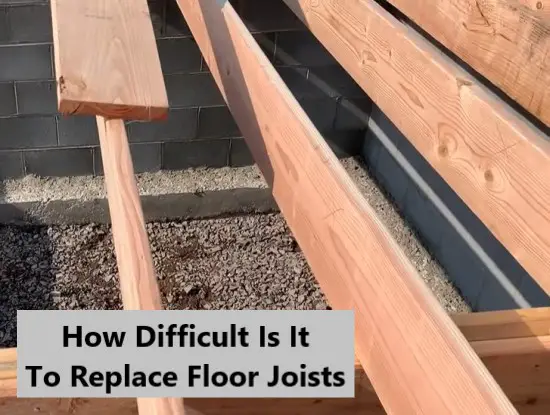
The floor joists are the main support for any home’s structure. When they become weak or damaged, it is time to replace them with new ones.
After many years of hiring professionals doing this job for me, I started to wonder, “how difficult is it to replace floor joists?” Can I carry out the job by myself?
Out of curiosity, I spent time finding the answer to satisfy this inquiry of mine. Fortunately, that investment in knowledge led me to understand this issue fully. That’s why today, I’ll share what I’ve obtained so far so that you will have to search no further than the content below.
Table of Contents
What Are The Signs Of Sagged Floor Joists?
Before determining whether this job is hard or not, it’s best to know exactly what you’re dealing with.
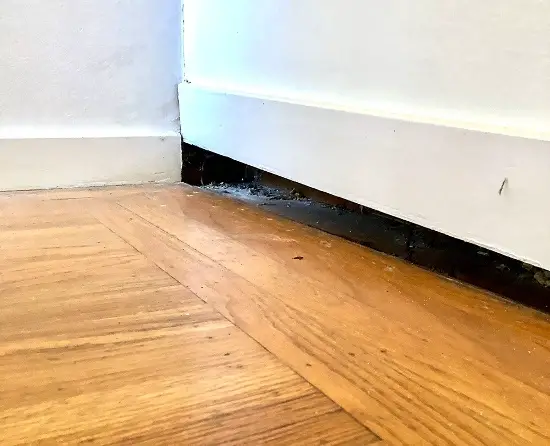
Sagging floor joists can be a serious problem that needs to get fixed as soon as possible. You might think that the most obvious sign of sagging floor joists is an uneven floor, but there is more than that. Some examples include:
Cracked Walls Or Crumbly Wall
Sagging floor joists can cause problems with your walls. Let’s check if there is any crack or fissure in the joints and corners, as these might lead to more significant issues later!
Windows And Doors Problems
You should have all your windows and doors fit well inside the house. Yet, it’s not so simple when there’s uneven flooring. They may be too loose as if they will rip off of your walls or too tight, making opening them more difficult than usual!
Lack Of Support
Initially, beams in older houses were spaced widely apart, but today’s building rules have altered the spacing restrictions. If you’re living in an old home, the larger spans between the floor joists and the beams may be the cause of your sagging floor.
Sloping Floors
Floors can be uneven for many reasons. In particular, a home’s flooring might suffer from moisture, long spans, or settlement-causing. If you notice your floors are off-balance too much in this way, then there may be something wrong with how they’re supported by their joists (the small wooden beams that make up most of our homes’ structural integrity).
Bouncy Floors
If you hear a loud clanking sound whenever you walk across the room’s corners, it’s likely that they’re not secure. Bouncy flooring causes the furniture and other items in the building to shake at every turn due to their insufficient support. If there isn’t enough firmness, this could mean your floor joists require further support!
You can tell if your floor is dipping or bowing by setting a marble or a ball on the ground and seeing where it rolls. If it dips, the ball will roll to the lower spot, but if you believe it bows, set the ball in the supposed high position and observe whether it rolls away.
To ensure your results are correct, perform this test from several room areas, even in adjacent rooms.
Some types of floors, such as smooth and wood floors, are better for this test than others. Yet, a thick carpet floor is a different story! In such cases, you may place a carpenter’s level on the floor at various points to check whether it is completely flat or not.
How Difficult Is It To Replace Floor Joists?

It is important to note different factors like termites and dry rot that can compromise your foundation joists. So if you notice this happening and your joists are still intact, simply install a new one beside them with lag bolts and construction adhesive for extra reinforcement.
I suggest removing and replacing the floor joist once they have entirely lost the structural support. Only after you’ve gone through the process can you tell whether it is difficult or not. Or else, those who have been through can give you a review, just as I’m showing you in this post.
Replacing the floor joist is a complicated process requiring you to shore up the floor and find and remove an old, damaged joist before installing your replacement. You’ll need protective gear for this task, as well as some carpentry experience and the ability to work in a limited space.
What Affects The Cost Of Replacing Joists?
When your home was damaged in a flood or termite infestation, you may need joist replacements. The cost of floor joist restoration varies substantially because of the two reasons below:
Where Can A Contractor Access Your Floor
In most cases, you’ll have to replace the floor above the damaged joists. However, if you can get access to the contractor from below (like from a crawl space or basement or a lower area of your house), you can still save these flooring instead of wasting more money on replacing them.
Whether You Replace Or Sister Floor Joists
Sistering floor joists are the more affordable option for those looking to keep their repair costs down. A second joist is bolted adjacent to the damaged one to provide additional support. There’s no reason to replace the original joists when this repair can only charge you as little as $100 to $300 per one.
How To Replace Floor Joists On Your Own?
It’s crucial to keep your floor joists in good condition at all times. As they begin to crack or rot, your floor’s support system is gone, leading to a shaky and unreliable floor. Even though replacing floor joists is a hard task, it is within reach of a devoted homeowner.
Let me show you step-by-step how I carried out this task in the following section. Here I would suppose you can’t reach the joist from below.
Step 1 – Remove The Floorboards
Whether they are joists under the floor in your home or those outdoors (like underneath a deck), there’s no way for you to access them without this step. You must first remove these covering boards before anything else.
A crowbar and a hammer will come in handy. Insert the tip of the crowbar between the planks and push it in with your hammer. As a result, the boards will separate, and you can use the crowbar to pry them away. Keep going until you’ve gotten rid of everything in the area.
Floorboards are delicate, and it’s not always easy to replace them without breaking or damaging any of them. It’s for this reason that you’ll want to focus your efforts carefully.
It’s possible that you can see where the damaged joists are, as they are visible on the floor. If so, you only need to remove the floorboards nearest to the damaged joists, then look in and determine which one you should replace. As always, start with the most noticeable ones and ignore those that are not absolutely necessary.
Step 2 – Mark the Old Locations
Now that you can see the joists, it’s time to take them down! Before doing this, make sure you’ve marked their locations. Normally, they would be 16-inch from each other, but there are also cases of 24-inch, so keep an eye open for those when measuring.
Step 3 – Remove the Old Joists
Choose a joist and an endpoint. Cut all the way across the joist with your saw, staying as near as possible to the end you’ve chosen without hitting the joist hanger or any nail if one is present. Then make a second cut with the same method on the opposite end.
Repeat this step for all old pieces that need replacing. Then, tap on them using the hammer until they pop out. Don’t forget to take out any nails before removing the joists completely!
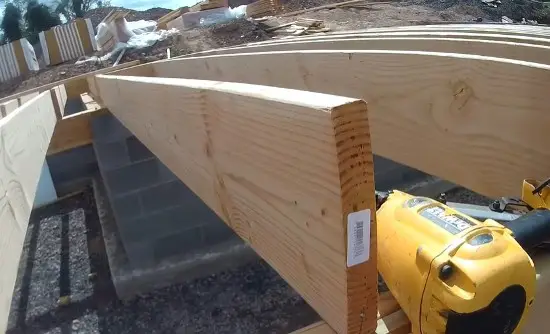
Step 4 – Replace the Old Joists
To get started, place your new joist hanger at the area that you marked and set the ledger board’s top in a straight line. Hammer the speed prong into the joist hanger to secure it while working and fasten it to the ledger board. You can use 16d-galvanized nails for outdoor use or common nails for indoor use.
Make sure your new lumber piece will fit the dimensions by measuring first. If it’s too long, just trim away until you have your perfect length!
You can now insert your new joist into the hanger and fasten it with nails. Regular lumber works well for indoor use, but make sure it can withstand the severe weather outside, like the pressure-treated wood.
If you are extremely fortunate, you may have the option of using old floorboards to conceal the repair – all you have to do is arrange them properly and nail them. If it’s not possible, you’ll have to buy and install new ones, which will cost you money.
Should I Repair My Floor On My Own Or Hire A Professional?
As long as you have the right knowledge and experience, you will be able to deal with surface floor damage. Still, it’s noticeable that even small projects must be done correctly for a better end result. Awkward-looking floors are just one example of this principle!
My advice is that you can carry out any jobs you find easy for you, just remember to be super careful while doing so. If you spot any obvious damage or that it is located right where people often walk by, hiring a professional contractor would be wise.
Issues regarding subflooring or floor joists that affect structural integrity are those that can only be properly fixed by an experienced expert.
Final Thoughts
At first, without a doubt, I made some of the mistakes of replacing the floor joists myself. Though, these mistakes are the precious experience that supports me in doing this job today.
How difficult is it to replace floor joists? I would say that it’s a pretty tough project! Not only do you have to determine where exactly the problem is, but you also have to pay 100% attention while replacing it.
Therefore, unless you feel confident and have the time and tools on hand, hiring a professional would get your mind off from anxiety.
Related Post:
- How To Refinish Pine Floors – 7 Steps To Have A Shiny Floor That Looks Like New
- Staining Maple Floor – How to Stain Maple Floors Properly
- Best Type Of Flooring For An Unheated Sunroom – Which One Will Suit You?
- How To Refinish Terrazzo Floors And Polish Them