If you are installing carpet in the office or your home, then you’ve probably seen the knee kicker. That pesky tool is used to hold down the newly installed carpet as it’s being stapled into place. It can be a pain to use and really hard on your knees after a while. I know what you’re thinking: “I just want my new carpet!”
This sounds like something familiar, and you have been looking for an answer to how to lay carpet without a knee kicker? Look no further! This blog post is going to give you some suggestions on how to lay carpet without a knee kicker and other relevant information. Scroll down!
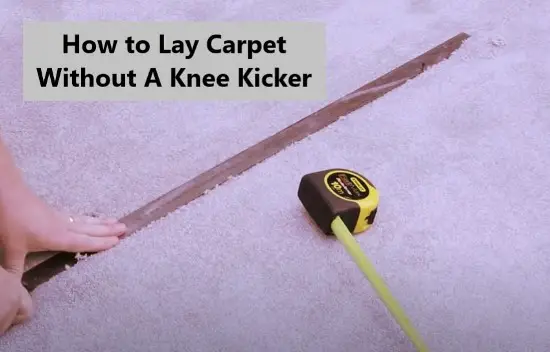
Table of Contents
How To Lay Carpet Without a Knee Kicker?
For those who are doing a DIY carpet installation and have no desire to use tools like knee kickers or stretchers, it’s important that you know the risks associated with not using one. Not only can buckling happen, but it also creases from lack of support in certain areas.
If you still insist on doing it without the knee kicker, I recommend you to wear non-slip shoes when laying down new floors because they will help ensure proper footing while working on slippery surfaces. Here is the guideline to do it:
Tools
Make sure that you prepare all tools:
- Utility knife
- Tack strips
- Staple gun
- Workman’s gloves
- Carpet padding
- Carpeting
Steps
Trust me, laying your carpet without the assistance of knee kickers is not as hard as you might think! All you need is some time and patience for your first try!
Measurement
One of the most important things when it comes to choosing a carpet for your home is measurements. You want one that will fit properly, so you need to measure the width and length of every nook in order not to buy something too small nor too big for it.
The better your measurements, the easier it’ll be to make sure you have enough room for doorways and latching onto tacks. For this reason, consider adding five percent more than what’s needed in order not only to cover these areas but also to leave some leftover, so that carpet isn’t being pulled too tightly across them!
Clean Your Room
Before you lay down the carpet, make sure that there are no dirt particles or objects left behind in your room. My advice is: Moisten a mop with water and then use this to wipe away any leftover debris from around its perimeter!
Step 1: Install Tack Strips
When you’re ready to install your carpet, make sure that the subfloor is in good shape and all of its edges are covered with tack strips. These will help keep any moisture from seeping into cracks or gaps beneath it, so it lasts longer!
The tack strips are designed to be installed against the wall. While normally you will need to install them 1/2 inch apart, as you will be tensioning out your carpets to meet them perfectly with no gaps or overlap whatsoever – placing them against drywall is an option as well!
Step 2: Cut And Lay Carpet Padding
Now it’s time to measure out the carpet pad to make sure it has the right dimensions needed for this installation. Make sure you take into account any width or height restrictions in order to avoid cutting off pieces, then use a utility knife with precision to do the cutting.
Next, place your carpet on a flat surface with padding against the tack strips. Starting at one corner, begin placing squares of cloth so that they cover as much ground as possible. Then, fold over every edge tightly before taking them down firmly in place (staples or glue works best).
Step 3: Cut And Lay Carpeting
Cut the carpet to the perfect square footage. Remember to use a sharp knife or cutting tool for an even cut!
Then, start at the far corner of your room. Move toward this point and lay down the carpet as you go until it meets up with an outside wall or door frame.
Step 4: Stretch Carpet Using “Jump” Method
When you’re done with laying the carpet, return to where there are tack strips and face towards them. Use momentum from your jumps to stretch out any wrinkles or pulls in between pieces for an even look!
Step 5: Connect Carpet To Tack Strips
Following that, take some workman’s gloves and put them on. Put the carpet’s edge over where you placed those pesky tack strips so that it will stick when tugged firmly by hand at each end. Hook up all four sides before moving onto another room!
Inspect the edges of your carpet to ensure that they are not coming up against a wall. If this happens, trim away with a knife, and you’re all set!
How to Tell If The Carpet Is Installed Well?
If you are still unsure wherever or not you have installed the carpet properly, here are some signs for you to check:
No Folds or Wrinkles On The Surface
It’s important to examine the surface of your carpets for wrinkles or folds that can cause them to look warped and rippled. If an installer didn’t adequately pull and stretch out their installation over carpet tacks, you’d notice crinkles in this area.
To find a potential problem with your carpets, step lightly on any wrinkles. If they go away immediately, then there might have been an issue in their padding. Otherwise, it could mean that the installation wasn’t done correctly and shouldn’t be ignored!
Smooth Seams At Borders And Walls
Inspect the seams where the carpet meets floors. If you see loose or frayed edges, it’s a clear sign that this is not installed well and should be repaired immediately!
Secure Edges and Stair Liners
You’ll want to make sure the stairs meet up with a wall at an even spot for maximum traction.
Make sure the carpet is securely wrapped around the railings and banister without loose ends or gaps. A neatly folded present-like shape indicates a proper installation.
Can You Lay Carpet Without Padding?
The floor will feel much harder without a pad. It actually lasts longer than you would think! That is why we find carpets in office buildings that are twenty years old- they didn’t have pads then, and things just got better over time.
Packing down your mattress in this way won’t cause a problem, as long as you keep it clean!
What Can You Use Instead Of a Knee Kicker?
A carpet stretcher is a tool that does the same job as an old-fashioned knee kicker. It is composed of 2 long poles, each with hinges attached at either end so they can pivot back and forth independently from one another when needed to spread apart tight areas in carpets or upholstery.
The process is simple: You grab one side of the carpet and push down, then repeat on both sides until you’ve forced it into as straight or an even pitch-and-fold pattern as possible.
If you want to get more creative, why not use any hammer action type attached at the end of your knee kicker in place of that soft pad?
There are many tools that can be used for this project, including hammer chisels and pneumatic palm nailers. You might also consider developing an invention with your own ideas on how to achieve forward pounding action while standing up so as not to use the knees too much.
Final Thoughts
After reading this post, you now know how to lay carpet without a knee kicker properly, right? I’ve laid carpet without knee kickers several times, and it was surprisingly easy. All you need is a little time to get started with your project!
Besides, the key is to take your measurements correctly so that the edges of the carpet will be easier to install once they are enrolled on the floor!
Related Post:
- How To Keep Carpet Edges From Fraying – Preventions And Repairing
- Carpet Vs Laminate In Bedroom – Which One Is Best-Suited For You?
- How To Get Hair Dye Out Of Carpet – Top 4 Methods You Should Know
- How To Get Flarp Out of Carpet – 4 Quick Steps