Probably, you’re thinking – what the heck does this have to do with me? Well, I’m glad you asked! If your floor is uneven and there’s no way of fixing it (or at least not without ripping up all of the floorings), then the chances are that you’ve been living in a world where baseboard molding doesn’t exist!
Believe it or not, baseboard molding is the best solution for uneven floors (at least it works best in my situation). Yet, it is essential to learn how to install baseboard molding on uneven floor properly, or else you might end up wasting your time for nothing.
If you have made up your mind and want to try this solution, read on this blog for a detailed guideline with me!
Table of Contents
How To Choose Baseboard Molding On Uneven Floor
Choosing the right baseboard for your home can be difficult. You might want it to look good but not clash with other things in the room, and you don’t want it taking up any extra floor space either!
When it comes to baseboards, there’s a wide variety of options available. You can choose between medium density fiberboard (MDF), wood, or even PVC for your material. Each of them has its own benefits:
MDF
If you are a budget-conscious person like me, MDF boards are a great option. They’re available in most styles so that you can find something to fit your needs easily. Plus, these pre-primed products make painting easy thanks to their primed surface already ready for paint touch-ups when needed.
Wood
Wood is an excellent material for projects that need traditional design elements. However, the cost can be prohibitively expensive when compared to MDF or PVC alternatives. This material also might not always provide all of the color variety desired in your project.
PVC
Though being flexible, PVC is a less durable option for most flooring needs. It’s well suited to rooms that could come in contact with water, such as laundry or mudrooms, where it will not absorb any moisture from floods. Therefore, you can clean the whole area more easily.
How To Install Baseboard Molding On Uneven Floor
Indeed, it’s hard to make a perfect 90-degree angle when the wall is not flawlessly square. For example, some room corners aren’t exactly correct, and as such, it can be challenging to get that clean-cut look on your flooring or drywall.
I know how frustrating it is to do all the work for a result that just isn’t what you expected. Thus, let me show you some tricks so your work will have a professional look, without any of the hassles!
Preparation
You’ll need a good set of tools for the job. It would be hard to tackle the task if you don’t own these:
- Putty knives
- Caulking
- Nail gun
- Sandpaper
- Shop vaccine
- Eggshell/Semi-gloss paint
- Materials
- Gloves
- Paintable caulk
- Baseboards
- Vinyl
Prepare The Baseboards
Deciding on the number or amount you need of each material can be tricky. I suggest you measure the straight sections individually, round them up, and divide them by two for an accurate result.
If you want to install a baseboard, make sure that there’s 15% more of the length needed. Schedule your day when it will be convenient for both installation and completion; this can take some time, so plan ahead!
Attach The Baseboard To The Wall
Place a carpenter’s level on top of each corner at about one-quarter inch intervals, then push down firmly to ensure an accurate position (you’ll see what I mean!).
Mark the cutline precisely. Make sure that you mark where there are gaps between some studs so that your cutline doesn’t move as you try to draw it! Moreover, make small holes on these marked spots so you can use them later when putting up the nails.
Measure one-fourth inches and place a compass point one-fourth inches away from each other.
Once you have determined the locations of your four compass points, place them against a wall and make sure they all line up evenly. Then, put the pencil underneath the board and draw the line with it. Remember to continue the draw until you reach the baseband’s end.
Optional: Set Up Quarter Rounds
Installing shoe molding or quarter rounds is an easy fix for small gaps. They are enough to fill up little gaps.
There are a few things you can do to make your cuts look more professional. For example, estimate the length of each board and use a pencil to mark it so that there will be an accurate cut line for you to see later.
You should point your nail gun from a 45° angle. We advise you to add some extra nails for the small bend to make it more sturdy and hold up well under pressure from heavier objects, such as boards or panels being nailed into place.
Fill Up Every Uneven Gap
Now, fill the gaps in your vinyl wall with a special paintable caulk that will stick like crazy. Yet, skip this stage if you use a concrete or brick foundation because it is not as flexible and may cover up any unevenness from those materials.
Fill in all those pesky gaps with your favorite weapon: Your caulk gun!
Wear gloves and dip your finger into the bowl of water to smooth out any bumps or ridges on top of it. This will be more effective if you run that wet digit along each seam, paying attention not just where there’s caulk but also near other areas!
Using wall spackling to paint over cracks and holes in your walls is also a good idea. It’s there will be no chance of shrinkage or cracking!
Additionally, do not forget to sand down any uneven areas, as this will make sure everything looks perfect before moving forward with the next step!
Paint Your Baseboards
Before painting, utilize painter’s tape to paint straight lines without dips or bumps. This will give your room a clean finish with smooth edges in no time at all!
It’s best to apply a semi-gloss or eggshell finish to your baseboards to make cleaning up any stains easier. Or else, refinish your baseboard using a fresh coat of color after removing the old paint.
Tips To Install Baseboard Molding On Uneven Floor
In this section, I will show you some useful tips to install baseboard molding on uneven floors.
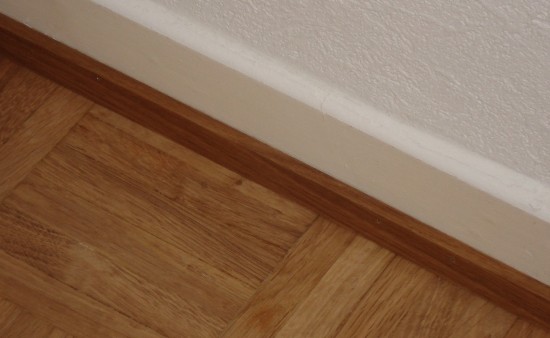
Fixing Tilted Corners Of A Baseboard
Tilted corners are one of the most common issues that you will encounter. If your baseboard’s corners aren’t level or straight, it can be fixed easily with a bit of work on your part!
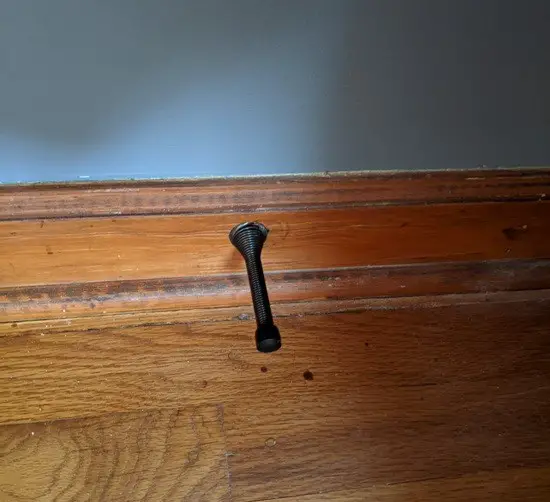
Close the gap between your baseboards with a screw! Take two inches of it and drive this into solid wood, then sand down any rough edges.
It is vital to make sure you are correctly adjusting the screw so that all corners get joined together. Once this has been done, installing your baseboard should be easy breezy!
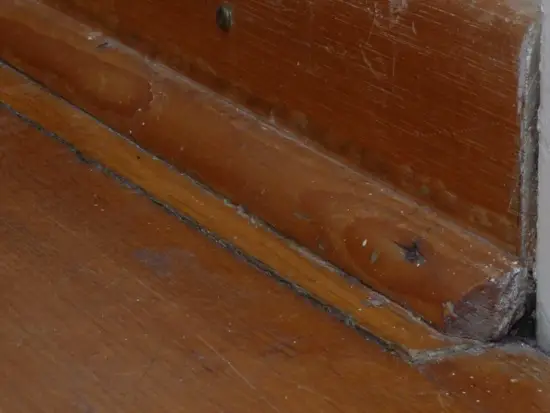
Fixing Tilted Baseboard
If you have a tilted baseboard, then it’s usually due to an uneven surface. Fill in the gap by putting wooden blocks on either side of your wall so that they’re flush with each other, and both sides are perfectly vertical!
In case you want to make your own flooring, use a half-inch planer board for best results! Cut the blocks according to gap size and place them over the hole, so they fill it completely with no gaps at all!
With the right tools, it is easy to install your baseboard molding over a covered gap. Trust me, simply use glue, and you’ll never have another problem again!
Conclusion
How to install baseboard molding on uneven floor? So, I guess you now know a proper way to install baseboard molding on an uneven floor after reading this blog.
The key is using suitable materials and tools so that your installation goes smoothly. Lastly, it’s always best to do research beforehand when tackling any new project in order to give yourself the best chance of success!
Related Post:
- Yoga Mat Tip: How To Stop Yoga Mat From Sliding On Floor?
- Does Laminate Flooring Need to Acclimate? – Notes When Installing Laminate Flooring
- How to Clean and Maintain Laminate Floors
- Find out the Right Answer: Can You Use Fabuloso On Laminate Floors?