There are quite a few reasons for changing ceramic floors, like renovating or changing your house’s look. In my case, I did not want to do this whole process just to change my space’s look, but I only did it when there was some damage on the ceramic floor.
With the tips taken out of my own experiences, I will show you all the steps and teach you how to remove ceramic floor tile from plywood. In general, this process can be considered hard or easy, depending on who did it. But with my tips, I think you will at least be capable of doing this job.
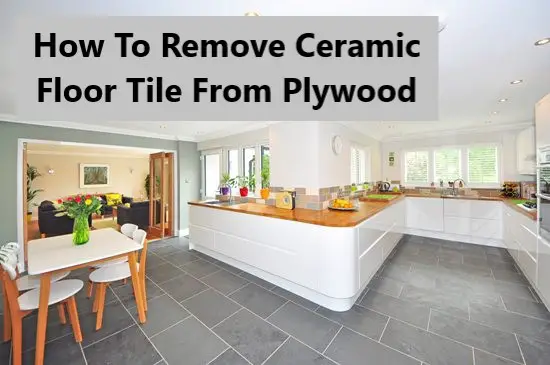
Table of Contents
How To Remove Ceramic Floor Tile From Plywood
Removing tiles from a ceramic floor is not always easy, but these tips can be made much faster and easier.
If you don’t know how to start removing your old tiles or are stuck in place due to grouting materials used by the previous owner of their house – my guide below will help you at some point!
Step 1: Prepare The Tools
To avoid making a mess or waiting time or energy when removing ceramic floor tile from plywood, you need to prepare all the tools, material, and gear upfront. Some of you might underjudge the role of gear, but I recommend you prepare for it for your safety.
Below are some crucial safety gears and materials you should prepare for this particular job.
Pieces Of Equipment And Tools You Will Need For Removing Ceramic Floor Tile
- Eye protection
- Dust mask
- Hearing protector
- Sledgehammer
- Hammer
- Broom
- Flat-edge shovel
- Flat pry bar
- Scoop shovel
- Masonry chisel
- Work gloves
- Boxes or wheelbarrows for carting debris
- Floor scraper
- Shop vacuum
- Circular saw (where needed)
- Wheelbarrow (knee pads)
Materials You Might Also Need To Use
- Masking tape
- Plastic sheeting
- Trash bags
Step 2: Break The Tiles
The first step includes removing molding, trimming door frames and doors that will interfere with tile removal. This prevents damage to them from happening or covering it in the dust during the demolition process.
Don’t forget to cover heating ducts and open doorways with plastic sheets to reduce the dust. You should also make sure that your tiling project generates little fine particles because this can travel throughout a whole house unless controlled!
When starting to tile the floor, break one tile next to any edge unless you have one missing or broken tile already. It’s best to begin with those exposed edges! You might need a brick chisel and a hammer while doing the job.
Step 3: Use A Rotary Hammer
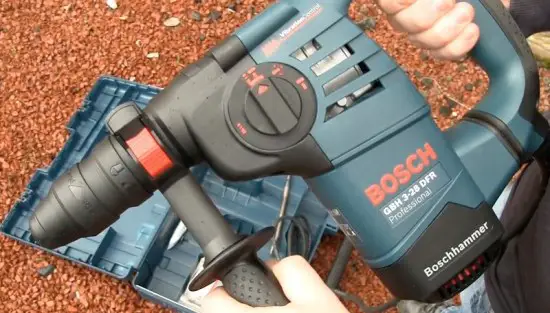
For your convenience, you can use your rotary hammer to break the tiles. Just remember, be careful not to use it on the first tile as this could damage your subfloor. Instead, manually get rid of the first one and use your rotary hammer with the remaining tiles.
Using rotary hammers requires extreme caution, and you should not chip the subfloor under your tiles. If you have accidentally done so, sand them down, then fill them in order for new ones to be installed properly on top!
Step 4: Scrape Off The Mastic
If you want your new tiles to be a perfect fit, the first thing is removing any old or damaged material from the surface, including the mastic. Next comes leveling and smoothing out that pesky dressing with an appropriate tool before installing anything else!
A scraper is a powerful tool that can be used if you don’t have access to electricity. This will make things go much quicker than if I was doing it myself, and using this tool really simplifies the process.
When stripping mastic off of plywood, it is crucial to keep the blade flush with no cuts running between boards not to cut and damage any other parts accidentally.
Step 5: Install A New Layer Of Underlayment
When you’re done scraping the mastic, it’s time smoothing out any dents or gouges on your floor. Use wood fillers before installing your new tiles! Epoxy wood type would come in handy for this case.
Before reusing the underlayment, you will need to remove any remaining adhesive or mortar. This can be done by scraping it up with a floor scraper and if this does not work for whatever reason, use a heat gun to soften up all of that unwanted glue!
In case you have a mortar bed and want it gone, break up the pieces with your hammer to remove any debris. After removing this mess, replace the underlayment before laying down new flooring if it is not in good shape. Then, you can install an underlayment layer using nails or glue.
Step 6: Install New Tiles
Once you have finished the previous steps, you can now start to install new tiles.
Read: The Ultimate Guide On Can You Use Wall Tiles On The Floor
Tips To Install A New Floor Tile From Plywood
The most appropriate product to your needs will depend on the issues you have identified in examining the subfloor or substrate. There are a few questions you need to figure out yourself, like:
- Do you need to level the floor?
- Do you need to address this?
- Is the product flat enough?
Ensure that the floor surface of your project has been leveled and meets industry standards before installation. If not, problems will undoubtedly arise during construction. Also, wall surfaces need to be properly prepared in order to avoid unwanted issues.
During this process, make sure you always pay attention to the power you force into the floor because plywood flooring is really easy to affect. Unlike other harder floors, you always need to be gentle with this floor in every step I listed in this blog.
Conclusion
Removing ceramic tiles from plywood can be a little bit tricky for those who do not know how to remove ceramic floor tile from plywood step by step. Yet, if you already know what to do in the right order, you will find things much less complicated.
The tips I gave in this blog were what I used before, and after following the same guide I showed you in this blog, I successfully removed the old ceramic floor tile and installed a nice new one on my plywood floor. I bet you can do the same!
Related Post:
- How To Remove Paint From Floor Tiles – Problem Solved
- Can You Paint Travertine Tile? If Yes, How To Implement It?
- How To Make Tile Floor Shine Without Wax
- [Home Cleaning Tips] How to Clean Tile Floors with Vinegar and Baking Soda