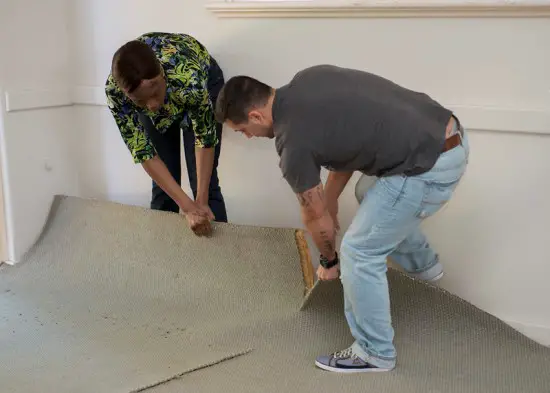
Changing your carpet is a great way to flip up your living space, but it is not an easy feat in the slightest! Aside from choosing and purchasing the new carpet, you will also have to know how to remove the old piece and fix the surface underneath.
It’s once been a headache of mine when I first remove my carpet after years. From that experience, I want to show you a complete guide answering how to restore hardwood floors after removing carpet to lend you a hand in this arduous process.
Put your working gloves on and stretch a little: you are going to need some elbow grease!
Table of Contents
How To Restore Hardwood Floors After Removing Carpet
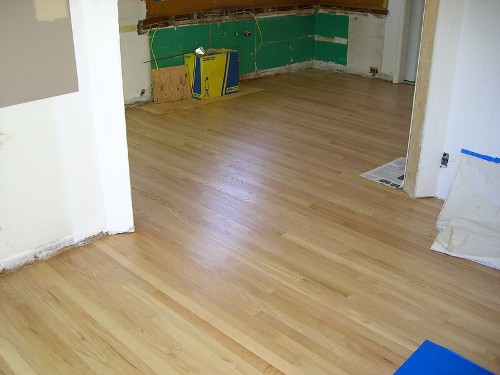
Once you have taken off the carpet from your floor, you are already one-third of the way through this process.
However, months and years underneath the thick covers have made your wood planks look rather gnarly. So it would help if you considered bringing it back to its top shape before putting another carpet on top of it.
Let’s go through these steps together. The process might turn out to be rather difficult to pull through, but in the end, you will have a stronger and more hygienic base for your carpet!
Deep Clean
Before giving the floorboards a thorough cleanse to return them to their former glory, pushing everything in your way out would be a great idea.
Since there are many steps to one area, you would want to do it all at once, rather than working on one portion at a time and repeating the steps all over again. We advise bringing the furniture to another floor or outside!
Here are the steps to go about this task:
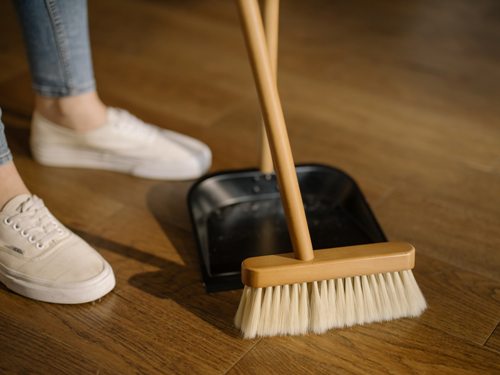
- Sweep the floor with a soft broom. Make sure to get all nooks and crannies off your floor so that the bristles can take away any dust and debris built up over the years.
- Pull out your vacuum and get in-between the crevices of the floorboards, as well as any corners your broom can’t reach. That way, you will be sure that you’ve got rid of all the dust bunnies by the time you finish the job!
- Afterward, prepare your hardwood cleaner solution and dip your mop into it. Do not forget to put the mop back into the bucket after a few strokes to make sure you have the cleaner on every patch of your floor.
The special hardwood floor cleaner will also disinfect your floor and give it a nice fragrance. Please make sure to let your floor air-dry to prevent any mold from growing and any liquid from penetrating the wood grains!
Avoid Sanding
No matter what other guides tell you, do not sand your hardwood floors unless you know what you are doing. It is possibly the hardest process to carry out in this entire guide, and it can get messy very easily.
Going too far while sanding a wooden floor is so easy that most people end up with a topcoat that can no longer support the wood planks underneath it anymore.
There are better ways to make your floors shiny and pretty again, without the need to put sandpapers and your elbows to work. You can try screening and giving the floor a new protective coat, and your floor will look like when you saw it at the store years ago.
There are many specialized products for this particular purpose, that’s why you should start doing some research. You can never go wrong with commercial chemicals since they come with a detailed set of instructions on using them properly. Things will never turn sideways unless you intentionally stray from the intended uses!
Remove Carpet Pad Glue
Most modern carpets depend on adhesive pads to stay in one place. This fact is especially true for hardwood floors since these types of carpet glue are very compatible with the surface.
Due to their concord in use, you can’t expect to separate them from one another with conventional methods. Instead, below is what you should do:
– Freeze And Vacuum:
You’d better refrain from using your typical cleaning solutions, as their general contents will not fit the job. You can try using a special glue remover to dissolve the adhesive pads.
Though a scraper to take the soft mush off the surface sounds nice, it can leave scratches on your wood. We suggest that you try using cold water or ice cubes to prevent further damages to the floor.
- Freeze your water into cubes, place them onto a pan, and put the pan on a glue pad. Be sure to spread the cubes out across the pan’s surface to make the most use out of the pan’s ability to deliver heat or lack thereof in this case.
- Wait for a few minutes, and the glue pad will start to freeze. You can use this chance to take a scraper and gently lift the pad off your floor. This work will loosen your frozen glue pad’s adhesiveness in its entirety, leaving you not having to scratch or put too much force to get it out.
- If there are any fall-offs after the process, you can give it a nice sweep or turn on the vacuum cleaner for a better result.
– Heat And Wipe:
Freezing is not the sole option, though. You can turn 180° and use heat instead. You will get a nearly identical result afterward, but it will require you to plug in a device or two. Here is how you can try melting the carpet glue pads and get them off your floor more easily:
- Plug in your heat gun or blow dryer. These two devices are excellent at heating things up without burning them, but you still have to be careful while wielding them.
- Hover the heating device about a few centimeters above the heat pad to melt them a little and to a much softer state.
- Utilize this chance to scrape or wipe off the adhesive more easily!
Be sure to have a cloth or some newspaper around to take the glue off your scraper and continue working. Aside from applying heat with a heating device, you can also use hot water the same way you do with the ice cubes!
– Sand The Glue:
There will be a few tough patches that do not react to either of the methods mentioned above. That is when you need to pull out your sandpapers and start chipping away these glue pads’ defense. Begin with more rough spots, and move onto the nicer ones when you grow a little tired.
– Break Down The Glue:
If you have reached this part of the guide, perhaps excess or lack of heat does not work so well. With these exceptionally resilient adhesive patches, the specialized anti-glue solutions are your best bet right now.
You may risk scratching your floor and ruining your hardwood floor’s finish, but with the glue that tough, the coat may be already in a bad state.
Acquire your solutions from a hardware store to be completely sure of their trustworthiness. Put a few drops on top of the glue patch, and watch it dissolve into a soft mush or even a liquid pond for you to scoop up or wipe away easily.
You might want to put on your gloves and masks as the solvents can release fumes and cause burns on your hands due to their concentrations.
Deal With Mold
Be sure to check for molds carefully because the mold can be visible on top of the boards or growing underneath it and hiding from you. Mapping out the area of mold to deal with is a good strategy because, from this map, you can find the source of moisture to stop mold from growing in the future. Please deal with the water source properly, or mold will infest further.
You can also look for an anti-molding solution to apply on top of the floorboards and in hidden corners. These products are available at any supermarket or hardware store!
Conclusion
That is my full guide on how to restore hardwood floors after removing carpet! Be sure to stick to the process slowly and not rush to have a long-lasting and neat-looking outcome at the end.
I know it might be a little bit tiring doing it yourselves, but you should be patient as the outcome will not disappoint you. Now, you can rest and enjoy the new addition to your home just in time for the new season!
Related Post:
- Can Swiffer Wetjet Be Used On Hardwood Floors? An Insight Answer
- What Causes White Spots on Hardwood Floors and How to Remove? – Home Care Q&A
- How To Remove Dog Hair From Hardwood Floors – Useful Information You Need To Know
- How To Get Rid Of Dog Scratches On Hardwood Floors – A Simple Guide