Like many people, you choose the tile floor since it looks gorgeous, durable and easy to maintain until you have to fight against stink, stubborn stain, and grout line. Cleaning becomes such a tiresome task.
That time, forget about the harsh chemical cleaners since you have mild green alternatives right in your kitchen.
Here comes a perfect recipe with vinegar and baking soda to clean your tile floor brightly and safely.
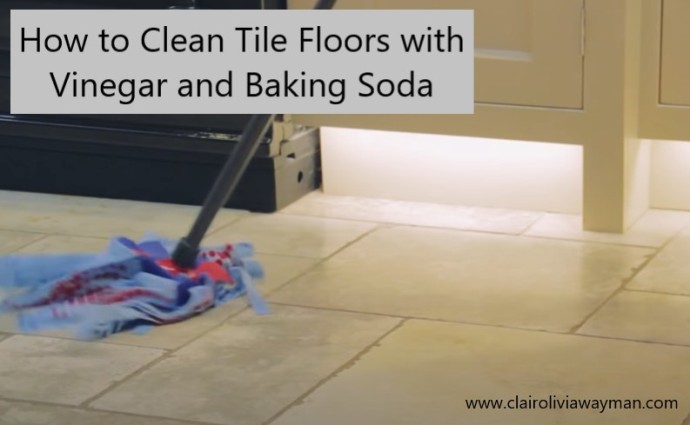
Table of Contents
Why Should You Use Vinegar & Baking Soda for Titles?
Chemical cleaners are advertised to make your floor shine in a matter of seconds.
They do, but be aware!
A study in 15 years revealed a shocking statistic that women frequently cleaning their homes with commercial cleaners had a 54% higher rate of cancer compared to those who did not.
We assume that chemical cleaners are safe, but it is actually full of toxins and harsh acids to get rid of the toughest specks of dirt. Both the floor tiles and even your children are vulnerable to such dangerous substances.
It is time to replace them with safer and natural options.
Also read: How To Clean Your Porcelain Tile Floors To Perfection Without Streaks
Vinegar – The Acidic and Health-friendly Nature
Interesting enough, vinegar is not only a cooking ingredient, but it is good at counteracting with icky stains on hard surfaces as well thanks to its natural acid.
Vinegar is strong enough to move out the grouts, stinks, stains, and other dirt while being milder not to damage your tiles. Once drying, it gives off a fresh and neutral scent. You can even customize for a more comfortable scent by adding a few drops of essential oil.
More importantly, vinegar is a non-toxic product, so you do not have to be worry if your naughty kids play or roll over the floor.
Plus, it is cheap and almost all available at hand.
But remember that vinegar is acidic, which means too much vinegar is not suitable for your floor. That’s why you should keep reading to get the proper recipe for this home-made cleaner.
Baking Soda – Double The Cleaning Efficiency
Baking soda for sweet cakes, baking soda for grandma’s bread, and now baking soda for your tile floor to brighten again.
This natural cleaner has a super-effective abrasive effect of getting rid of countless spots on your floor. At the same time, its deodorizing agent picks up any odor quickly to give back your shiny tile.
The combination of these two cleaning arsenals brings the most effective result at a friendly budget. You spend almost nothing but some ingredients in your kitchen. The recipe is also straightforward, which can be mixed in some minutes. Both are toxic-free. Good for home and good for health.
Both the ingredients are non-toxic which safe for your health. When you use them combined on the tile, you get back the elegant appearance of within a moment!
Read: How To Clean Dog Urine From Tile Grout – Get Rid Of Stain And Smell
What Do You Need Prepare in Advance?
You must have had a set of cleaning tools available in your house to free your titles and other places from dirt and stains. Let’s check whether your devices are adequate enough!
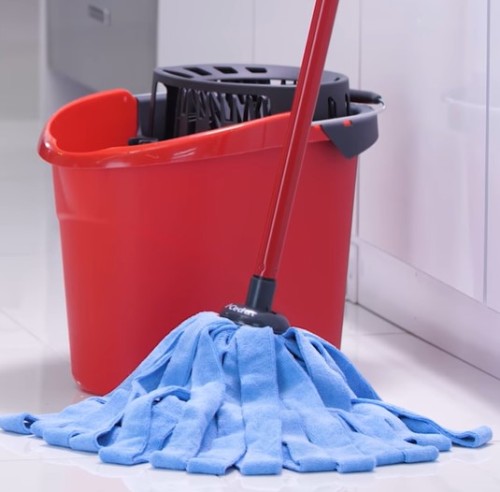
#1. Mop
Floor tiles are quite easy to maintain and clean, yet this cleaning task involves using specific supporters. The mop is the very first need to wipe away the excess dirt and grime before handling with stubborn stains or grout lines.
Not all mops are the same!
There are at least four types of mops to consider for your house.
Traditional Mop
This option comes with a classic cotton mop head or fiber heads. Best points are it hardly need to maintain and is possibly used in many types of floor.
On the other hand, its big head makes it hard to get into tight corners. Also, your floor can become wet and slippery if you do not control the amount of water in the head well.
Spin Mops
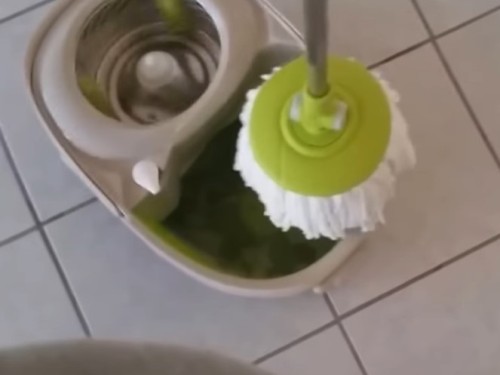
A mop handle, the bucket, and replaceable mop head are included in one mechanism. There is a “spin” centrifugal wringer at high speed to get rid of water from the head based on your controlling.
Even better, many spin mops have triangular-shaped heads to reach the corners more easily.
Steam Mops
This type of mop is ideal for picking up hair, dirt, and debris using its water reservoir and an internal heater. However, the high price might force you to think twice. And, do not expect the steam mop to wipe out tough grout stains.
Scrub Mops
With a harsh brush on the head, this mop works well to fight with hardened stains. Also, it can reach out to almost every corner of your house, especially the tile floor’s grout line.
Nevertheless, you must use more effort with the scrub mops that might even bend the handle or harm the surface of your floor.
Related that, if you are planning buy a mop, read my article about best mops for tile floors. It’ll help you!
Related: Do Steam Mops Damage Tile Floors? – Helpful Advice On How To Use One!
#2. Brush
Mop works to remove most of the dust and dirt; however, a brush is in place to fight with the more challenging parts such as grime, grout lines, oily liquids.
For delicate floors like tiles, it is better to use soft bristle brushes to scoop out the severe substances without scratching surfaces.
In case you have not had a specific floor brush yet, a toothbrush is an alternative though it is a bit time-consuming.
#3. White Distilled Vinegar and Baking Soda
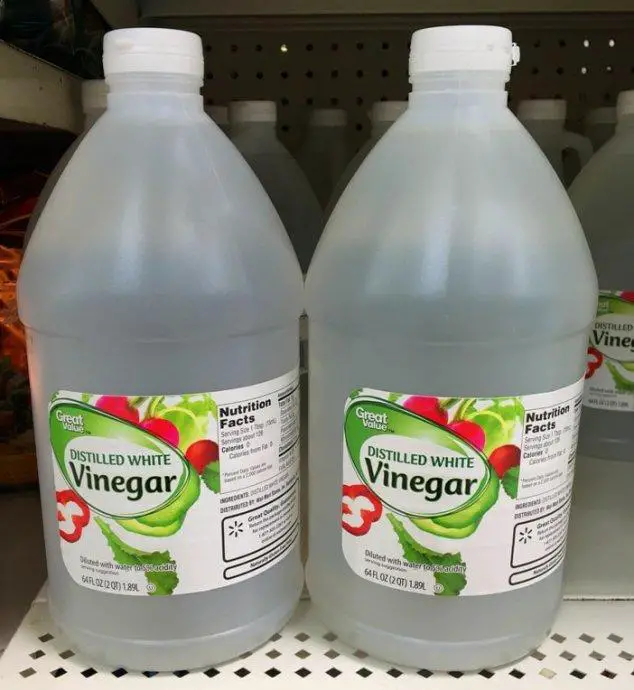
We absolutely can not miss out the most essential recipe: Vinegar and Baking Soda. In fact, any kinds of vinegar will do to kill germs and bring back your floor’s shine. However, white distilled vinegar is the most recommended.
This mixture of water and sun-ripened grain is available at most grocery and big box stores. Baking soda can be found there, too.
You should buy a large amount at a time since the frequently you clean the floor, the better it is. Also, vinegar and baking soda are useful cooking ingredients.
#4. Other Things
Do not miss out the following items as well:
- A vacuum or sweep: You must sweep your house before applying any water cleaning.
- 5-gallon bucket: If you do not use a spin mop, you need to prepare a bucket to wash the mop during the cleaning.
- Spray bottle: The hardened stains often lie here and there, so you had better use a spray bottle to save water on cleaning and also get your floor dried quicker.
- Hand gloves: Though vinegar and baking soda are toxic-free, get gloves to protect your sensitive hands from other specks of dirt on the floor.
- Clean water, a cup, and a tablespoon.
Read: Pocket the Right Answer: Is Bleach Bad For Grout?
How to Clean Tile Floors With Vinegar and Baking Soda?
Follow 5 steps to move out of every single dirt from your lovely tile floor.
Step 1: Sweep off your floor
Most mops are poor at picking up crumbs, solid debris, or hair.
Before cleaning the tile floor with vinegar and baking soda, you must sweep off almost all noticeable particles and dust. That way, your cleaning is quicker and more comfortable.
You can use a vacuum cleaner to ease your work, not to mention it can access many corners of your house. It is better if you clean the floor with a clean mop as well.
Step 2: Create a mixed cleaner from vinegar and baking soda
While waiting for the floor to dry, you can make the natural cleaner with vinegar and baking soda. The bucket is in use.
Each ingredient is an effective cleaner itself, but the combination of these two carelessly causes the big fizzy reaction that neutralizes their effects. Your perfect cleaner becomes mainly water and sodium acetate. It means there is little left to get your floor shine again.
Take note the most successful proportion:
- A half cup of water
- A half cup of detergent with 1 ⅔ cups of baking soda
- 2 tablespoons of white distilled vinegar.
Stir and mix them thoroughly in some minute before pouring the mixture into the spray bottle.

Do not use so much! –Source image
Step 3: Spray off the mixture into the tile floors and grout
No need to spread all the mixture on the floor, you have already moved almost particles away in the first cleaning. Instead, spray the solution into the hardened stains or between the grout lines only.
Remember to wear gloves to protect your hands. Sit the mixture there several minutes, so the dirt gets softened and easily cleaned.
Then, use the brush to scrub even the stubborn dirt from the grout. Use a soft brush and do not push it too hard or your tile floor will end up with ugly scratches. Wash or replace the bush with a new one if the existing brush starts collecting dirt.
Repeat the process from spraying the solution to scrubbing the floor till all dirt is raised up.
Step 4: Use a mop or rag to clean the tile floor
The final step is to wash out all the dirt scrubbed and the vinegar and baking soda left on the tile floor.
Fill into the bucket with enough water to submerge the mop head completely. Warm water is better. If possible, add some essential oil so that your house will smell more comfortable after the cleaning.
Next, dip the mop into the water for a while, so it gets to loosen up and soaked with water. Lift the mop up and let the excess water drip back to the bucket. In case you use a spin mod, this task can complete with ease.
There are several recommended techniques to mop properly:
- Mop your tile floor in small sections (4-to-6-inch areas at a time)
- Get your way of directing to the door so you will not step on parts where you already cleaned.
- Move the mod sides first and the center later in narrow stretches
- Clean the mod several times during your cleaning
- On completing, wring the mop out and squeeze the mop head to get rid of the dirty water.
- Unpack your mopping supplies to clean before putting it aside
101 Takeaway Best Practices to Maintain Your Floor
Keeping the tile floor clean as new is not so hard as you might think. In fact, tile is famous for its easy cleaning and water resistance. Tile is known for its water resistance and easy cleaning. Just follow these useful floor caring tips, and your floor will look great and stay for years.
“Dos” List
- Better apply a sealer to grout joints right after the tile floor’s installation
- Sweep or vacuum your floor daily, so that dirt particles have fewer chances to stick and turn into grime on the surface or between the grout.
- Focus more on high traffic areas like the door’s nearby before it is too late.
- Also, remember to clean your comprehensive tools or vacuum machines frequently so they can perform their right functions rather than adding the dirt to your floor.
- Avoid oily or liquidy spills as soon as possible to minimize the stains and complaints
- Get tile cleaners with a neutral pH so it will not affect the floor’s lifespan. A natural mixture of vinegar and baking soda as above is recommended. You are not only free from headache grime, but you also protect the health of your family
- Prepare a multiple spray cleaner to get rid of the scrum, mildew, or hard water deposits quickly. This simple habit turns out easing your cleaning task later
- Try to scrub/recoat more often and strip/recoat less often since it reduces the number of pollutants into the water system
- Take the place of the broken or damaged tiles with qualified replacements in order not to affect the other tiles nor trap the unexpected dirt
- Invest in mats or protective pads in which of heavy furniture to strengthen the protective layer of your floor. Place them at the high traffic places such as your doors. Sand, dust, grit, oil, and driveway sealer will be significantly absorbed by these mats and pads before reaching tiles
“Don’ts” List
- Keep off the chemical cleaners for routine maintenance as much as possible because they might harm your health and your floor’s durability.
- Do not brush the tiles hard or you will ruin their look and make room for dirt to come in
- Neglect the small food particles, spills or dirt. Clean it in a matter of minutes with sprayed warm water, vinegar, or baking soda. If you leave these spots untreated in time, even the tiniest spill gets into a tough stain.
- Put tiles under much pressure without protective solutions. For example, you install a large sofa directly onto your floor. After some time, the moving chair leaves the tiles with cloth, dust, and scratches. Even worse, your tile floor gets crashed.
- Only mop rather than scrub the floor carefully. Some excuse themselves their tile floor is almost clean as there is little traffic. However, stains or grime in the grouts are hard to see, let alone remove with the mopping clean.
So do the floor cleaning with care following some tips recommended in this Clairoliviawayman‘s post.
Conclusion
Whether you have a stubborn dirty tile floor or you feel hesitant to install a tile floor, do not worry anymore as we(Clairoliviawayman) cover all cleaning tips here and “Right here” for your reference.
Just try our recipe and see how it works to get the polished floor back. Give a vote so that we know this natural cleaner is useful in your case.
And, feel free to share any other cleaning solutions working excellently on your floor so other people and we can discuss more.
We share to be shared.
Related Post:
- How To Remove Paint From Floor Tiles – Problem Solved
- How To Remove Ceramic Floor Tile From Plywood: Detailed Instructions With Tips
- The Ultimate Guide On Can You Use Wall Tiles On The Floor
- Can You Paint Travertine Tile? If Yes, How To Implement It?
Thank you for the good information.
2 genuine comments: you make what should be an easy job so difficult, too much work, it is not necessary to do all those steps. And secondly, Please do something about the shocking standard of English used. It is too bad, irritating to read, and that even puts doubt on the credibility of what you write.