After using my laminate floors for a while, they started to have bubbles on their surfaces because I didn’t protect them carefully. At first, the bubbles only made the floors look bad, but these bubbles soon expanded and caused the floors to curve.
As a DIY enthusiast, I’ve attempted to learn how to fix bubbles on laminate flooring by replacing the boards, and I’ve had some successes. So, if you are curious about it, please continue reading. I’ll also give you some tips to fix the bubble and maintain the floors’ quality for a longer time.
Table of Contents
Why Bubbles Appear on Laminate Floors?
Water Spills and Wet Mopping
The manufacturers or sellers might tell you that the laminate floors you are currently using can withstand water and steam mopping. Still, you should never believe this advertising statement 100%.
Yes, there is higher-quality laminate flooring available these days, and they are water-proof. However, laminate is laminate, and it is not water-resistant. If you frequently wet mop or steam mop your laminate floors and leave water on them without drying right away, damages will appear after time.
Normally, bubbles are only the first level of damage. If you do not fix it, the problem will worsen, and you might need to replace the floor completely.
Not Enough Expansion Joints – Installation Mistakes
Those who install the flooring on your house should be professionals or at least have a thorough understanding of how to install laminate sheets properly. For laminate flooring, there should always be reasonable gaps in the boards’ joining sections.
When it comes to larger area installations, it is a must to have expansion joints. Otherwise, the air will be trapped under your laminate floors and cause bubbles.
Too Much Tension
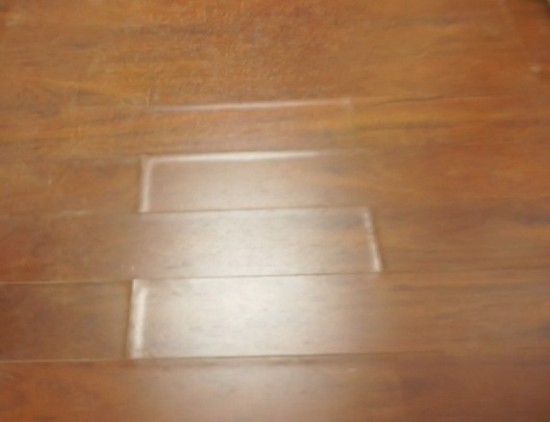
When there is too much tension between your laminate planks, bubbles can easily cause. Just like any other materials and objects, laminate will also expand when the temperature increases and contract when the environment is cooler.
If you do not leave the gaps between the planks, two planks will expand when the temperature increases and cause bubbling, peaking, and buckling.
How To Fix Bubbles on Laminate Flooring – Step-by-Step Instructions
I cannot say whether it is hard to fix bubbles on your laminate flooring. If you understand the whole process and apply proper methods, you can achieve good results. However, if you do things wrong, you might accidentally leave rooms for more damages to be caused in the future.
So here is my step-by-step guide that you can follow while fixing the bubbles and replacing the laminate boards:
Check Your Floors Carefully
To begin with, you should check your flooring carefully first! Let’s inspect how many boards to replace in total and where these boards are located. This way, you can fix all the bubbles and possibly other damages later on.
My piece of advice is to double-check the boards to make sure you’ve marked all the damaged ones. I used to skip this step, and soon after that, I realized there was more damage to work with. That feeling was quite annoying!
Burst the Minor Bubbles
In most cases, laminate boards with bubbles need to be replaced. However, for tiny bubbles, you can burst them instead of replacing the whole board.
To burst the minor bubbles, you put a damp cloth on their surfaces, then use a sharp knife to cut the bubbled area. After that, pour some wood glue on the cutting area and press the board down. To make your floor look flat, you can put a weight with a flat surface on the slit area and leave it there for around 10 hours.
In case the damage is more serious, follow the next steps.
Work with the Laminate Molding
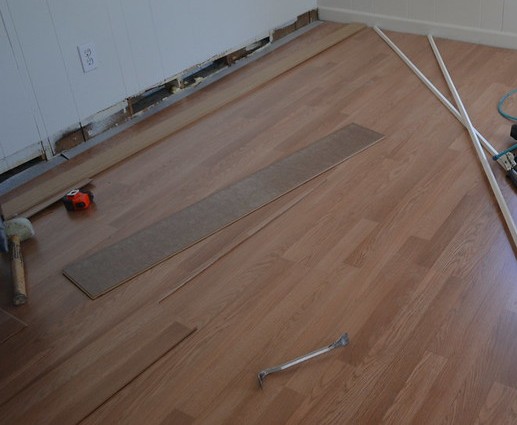
Right after you spot all the bubble boards, you need to remove the laminate molding in order to work with the boards. The molding is located in the wall and nearest to the laminate boards you are about to repair.
You can remove the laminate molding using a hammer, screwdriver, or chisel. However, take your time and do it slowly (especially when this is the first time you remove the molding). If you try to rush the process, you might damage the floors and have to refit your wall molding after finishing.
Replace The Damaged Boards
Unfortunately, damaged laminate boards cannot be repaired or fixed. We need to throw them away and replace them with new ones.
As I mentioned above, one of the reasons for bubbling is too much tension or lack of gaps between the boards. To prevent this, you should check the fitting condition of the board after unclipping it. If the gaps between the boards are too small, you must choose the new boards with a more suitable size when replacing them.
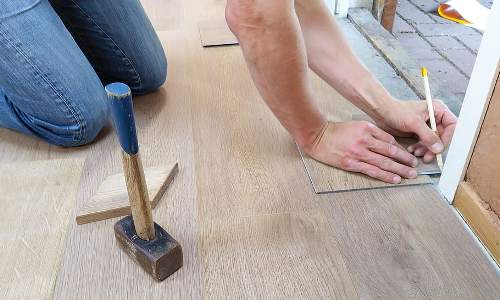
After making sure the boards are good to use, you can start unclipping the damaged boards. Now, install the new boards and lock them into their places. Again, you will need to ensure the expansion space is reasonable.
Advice: After removing the bubble flooring, you should check the sub-flooring to see whether there is too much moisture. If the humidity level is too high or there is water on the subfloor’s surface, you should clean and dry it to avoid the same problems and damages caused by moisture in your new boards.
Seal the Floors to Avoid Moisture
After you are done replacing the damaged boards, ensure you seal these boards to avoid moisture and direct water to cause bubbles again in the future. In case your floor is the glue-down type, you should wipe all the excess glue after installing the laminate boards.
Reattach the Laminate Wall Molding
In the previous steps, you had already removed the wall molding to replace the bubble floors with the new ones. Now that everything is done, you must reattach the wall molding back in the same place.
Recheck
Even though I advised you to recheck all the damaged boards before replacing them, there is a chance that you overlooked them for whatever reason. Before you finish, take a few minutes to inspect your work to see if you missed some boards. When you’re certain everything is done, you can now sit back and enjoy bubble-free and damage-free laminate floors.
Tips for Fixing and Preventing Bubbles on Laminate Surfaces
Besides the guide, these tips will help you get better results while replacing your boards and avoid further damages in the future:
Be Careful with Water and Moisture
To prevent bubbles and damages, you should always be careful with water and moisture. Whenever water is spilled to the floors, grab a dry cloth or cloth-head mop to clean it right away. Moreover, you should not use too much moisture on the floors as it can cause damage.
Avoid Wet Mopping and Steam Mopping
Wet mopping, especially steam mopping, can be extremely damaging to laminate if you do it constantly. If your floors are super dirty, you might have to wet mop your floors, but please do it quickly. To protect the floors, you should say no to steam mopping.
Choose Cleaning Products That Are Safe for Laminate Floors
Laminate flooring is more easily affected compared to other hardwood floors. So, it would help if you always choose the commercial products and household ingredients that are safe for it.
Use Dehumidifiers If Your Environment Has A High Levels of Humidity
Humidity not only causes bubbles but also makes the laminate floors curve. If you live in an area with a high humidity level, you can use a dehumidifier. This small machine is beneficial to the laminate and to your health, too.
Use a Vacuum to Dry Water Under the Laminate Flooring
In case the water under your laminate flooring is not from the subfloors, you can use a vacuum to dry it out. However, this method does not always work in all situations. When there is big damage caused by water, you also need to replace the boards.
Final Thought
Throughout this blog, I have already shown you how to fix bubbles on laminate flooring with my step-by-step instructions. But even that’s not enough! I used to only focus on repairing the damages and ignore the maintenance steps, and as a result, my flooring gradually had bubbles again.
That’s why I advise you to take the time to maintain your floors with the simple tips I provided. If you put some effort into protecting the laminate floors, you will be much less likely to replace them due to bubbles and curves!
Related Post:
- A Detailed Instruction About How To Get Paint Off Laminate Floor
- How Do You Remove Scratch Marks From Laminate Floors?
- How To Stop Washing Machine Moving On Laminate Floor
- How To Level Furniture On Uneven Floor Effectively And Easily